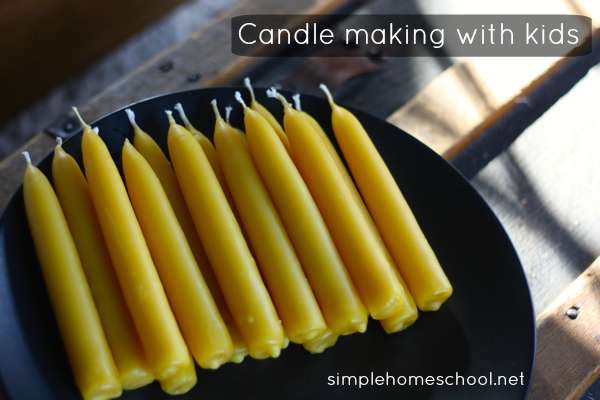
Candle making with kids ~
Written by Jamie Martin of Simple Homeschool
You guys? I did something amazing.
I. MADE. FIRE!
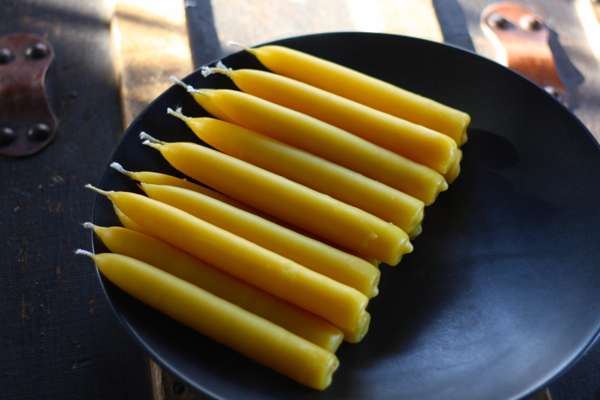
Well, hand-dipped beeswax taper candles at least.
If you know me at all, you know that I don’t “do” crafting.
I try to stick with my strengths, which happen to be in mostly non-artsy arenas.
But I love learning how to make practical things that my family can use, and for this reason (as well as reading about Mother creating them in Farmer Boy), I’ve always wanted to try my hand at making candles.
Last month I finally gathered all the supplies we’d need, and tried to prepare myself mentally for the fact that creative projects don’t always turn out well the first time one attempts them.
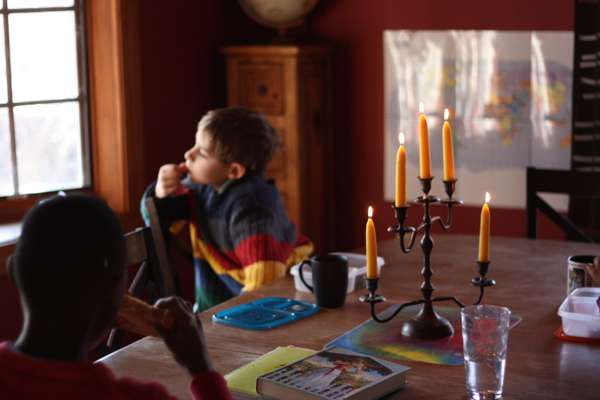
But this one did–glory, hallelujah! The kids were fascinated by the process, the candles turned out beautifully, and we’re lighting them every night over dinner.
If you could use a project for a rainy or snowy day, here are the step-by-step instructions we followed.
Supplies you’ll need to make your own beeswax tapers:

* Organic beeswax (3 pounds was enough for us to make 20 6-inch candles, with leftover to start the process again next time)
* #24 ply braided wick
* 1/4 inch nuts (these weigh the candles down until they get heavy enough on their own)
* cardboard (a cereal box works)
* a ruler
* an old knife or stick for stirring (this will get covered in wax)
* a tall, narrow, wide-mouthed glass or metal container (We used an old glass vase. It needs to be narrow and tall or you won’t have enough wax. A wide-mouthed Ball jar might work as well.)
* an old sheet, drop cloth, and/or newspaper to cover the floor/counters in case of drips
* a large pot to serve as a double boiler
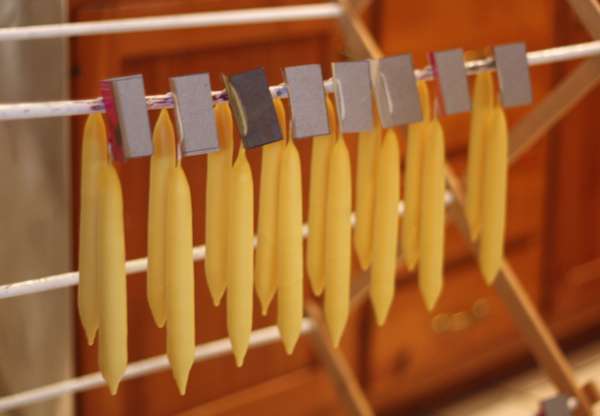
* a rack or hanger on which to let your tapers dry between drips (we used our laundry rack)
A note about essential oils: I tried adding lavender oil to our beeswax, but the scent really didn’t come through–which is why I haven’t included it in the supply list
Got everything you’ll need? Yay! Let’s get started:
Candle making with kids
Time needed for this project: Approximately 4 hours start to finish. 1 hour to melt the wax and get ready – the other three for the dipping and clean up process.
Adjust the time up or down depending on how many candles you’re making (we made 10 pairs/20 candles) It sounds like a long time, but it sped by!
We did this on a Thursday, which I usually set aside for our homeschool group or a bit of variety in our week. This way it didn’t disrupt the rest of our weekly learning rhythm.
Step 1. Melt your wax
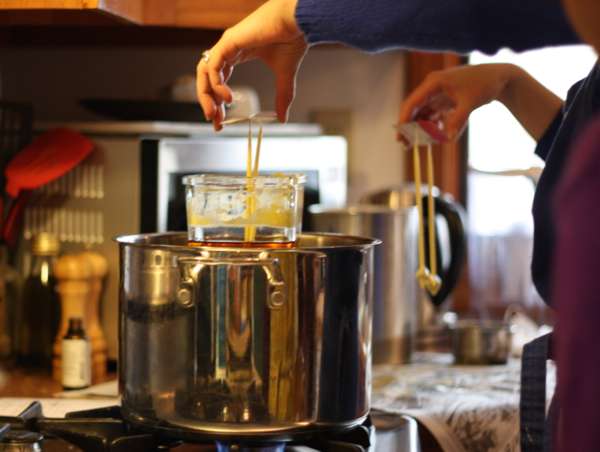
Boil enough hot water to fill your large pot about 3/4 full. Fill your narrow, tall container with beeswax and place it inside the pot. It will slowly start to melt.
Keep an eye on it, stir now and then, and add more wax as needed until you have melted wax about two inches from the top of your container. Eight inches of wax will make six inch tapers, seven inches of wax/five inch tapers, and so on.
For us, the melting process took about an hour total–good thing the kids were occupied with a Colonial Williamsburg Electronic Field Trip at the same time! I prepped all the supplies while we watched.
Once your wax is melted you can leave your boiling water on low to simmer, or you can turn the burner off completely and turn it back on just when you need to add more wax.
Step 2. Prepare your supplies
While your wax is melting, prepare your other supplies. Using a ruler and your cardboard, mark and cut out two inch square pieces with small slits in each side. Make one cardboard square for each pair of candles you’re planning.
Then you’re ready to cut your wicks. The length you’ll need will depend on how long you want your candles to be. We used 18 inches of wicking to create 6 inch tapers.
For 7 inch tapers, use 21 inches of wicking.
For 5 inch tapers, use 15 inches of wicking.
Once you have your wicks ready, tie a metal nut to each end. No need to make a full knot, just threading it through and tying it once will hold your candles down in the wax.
When the bolts are fastened securely, thread each piece of wicking through your cardboard slits. The cardboard will keep your two candles from sticking together as you dip.
Step 3. The Candle Dipping Process
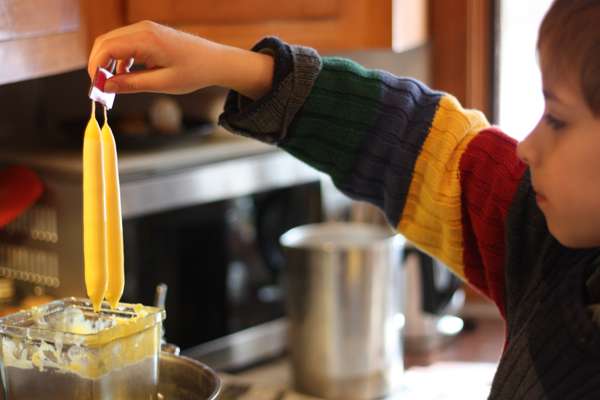
Holding on to your cardboard square, dip the wicking down until you get as close to the top of the square as possible without getting your hand in the wax.
Pull it out again and hold over your container for a few seconds in case there are any drips. Then hang it over your hanging rack and continue dipping your next pair.
I had each of my three kids work one-on-one with me for about 30-40 minutes during the dipping process. Because of the hot wax, I’d probably recommend this project for ages seven and up.
When your candle stems look heavy enough to weigh themselves down without the nuts attached (for us this was after 30 minutes), cut the nuts off with scissors and have your handy assistants remove the wax so you can use them again next time.
It was so fun watching the tapers grow as we dipped that it felt like time flew by! And basically that’s it – just continue dipping until your candles grow to the size you need/want them to be.
Every so often you’ll need to add more wax as your level decreases and then wait for it to melt.
When the tapers reach the right size use a knife to cut off and flatten the bottoms of the candles while they are still soft.
Step 4. Clean Up
Clean up was fairly simple. I just let the leftover wax harden again in the container and set it aside for us to melt and use next time! Then we cleaned up the newspapers covering counters and put away our supplies.
Our candles were ready to light in less than an hour and they burned beautifully–no dripping or mess, which was supremely satisfying.
Though this might seem like a time-consuming ordeal, I found it a calming, bonding project to do with the kids.
Each of them asked me when we could do it again, and now that we have our initial stock of supplies, it won’t be an expensive project next time.
More Candle Making Inspiration:
- Natural Soy Wax Candle Making Kit – Trishna (11) got this kit for Christmas and we had fun with it. It’s a simple way to get started with candle making.
- The Art of Candle Making DVD – We have a few of these Homestead Blessings DVDs, and this one was our initial inspiration to try making tapers.
- Make Your Own Beeswax Candles Kit – A good alternative to this process if you want to make beeswax candles with younger children–just roll them up!
- Jar Beeswax Candles @ Little House Living – This is on my list to try out next time.
“Mother dipped the whole mold quickly into the boiling water, and lifted the sticks. Then Almanzo…trimmed the ends of wicking off the flat ends, and he left just enough wicking to light, on each pointed end.
And he piled the smooth, straight candles in waxy-white piles. All one day Almanzo helped Mother make candles. That night they had made enough candles to last till butchering-time next year.”
~ Farmer Boy, Laura Ingalls Wilder
What’s Your Homeschool Mom Personality? Take Jamie’s quiz now and receive a free personality report to help you organize your homeschool based on what your personality type needs most!
This post contains affiliate links.






 Weekend homeschool links
They’re so pretty, Jamie!
Caroline Starr Rose’s latest post: Dyslexia and MAY B.
Thanks!
Wow! You make this actually look possible. Thanks for posting. Maybe if the wicks were soaked in the essential oil first, they would release the scent when burned?
That’s an interesting idea, Hannah. I bet that might work!
Wow, thanks so much for making this look do-able! I’ve wanted so much to do this and felt so intimidated. Well, no more! 🙂
I’m so glad, Lynda. Providing you pick a day when you have plenty of time, I think you’d enjoy it.
This looks like so much fun! I have a vague recollection of maybe trying it as a kid at a pioneer place, but I’ve never done it with my own children. Thanks for the inspiration!
The small mason jar candles, we have made, and they smelled wonderful…..but they didn’t burn evenly for us and we ended up recycling the wax about halfway down later on. If you figure out a way to avoid this, I’d love to know what it is so we can make some more!
Erin – The Usual Mayhem’s latest post: Kid-sewn, kid-designed capelet
Hmmm Erin, I’ll keep that in mind if and when we try those out. I had actually heard that about the tapers (someone who had made them and they looked great but burned terribly), but that didn’t happen to us. I wonder if it might have to do with the quality of the wax?
Oh your candles are so beautiful. Thank you so much for the reminder to do this with my younger kids, they would love to make these and I had quite forgotten about them.
se7en’s latest post: Se7en’s International Book Giving Day Project – It is Time to Create Another Library…
You’re so welcome!
Yeahhhh! You did it! They turned out so great!!!! I am inspired to think I could do this craft inside my apt as it has always been a kind of outdoor activity for us! Try to find a local beekeeper and get your wax that way maybe! Might be kind of fun to have the kids learn about the wax and see it in its raw form! Thanks for sharing as always! (we have begun reading the Little House series! One chapter a night. It has been one of the most special reading rituals we have had as a family!)
I have always wanted to do this with my kiddos, but know how big a time commitment it is and just never bit the bullet. Your gorgeous results (and photos of the process) my have just changed my mind!
Heather@To Sow a Seed’s latest post: From ashes
I hope you’ll give it a try, Heather!
These are simply beautiful. As our homeschool year is drawing to a close, I find that I have been over focused on the “have to”s of school: math, reading, spelling, and it is time for me to step back and enjoy the beauty and freedom of homeschooling. We will do this beautiful project as soon as my beeswax arrives! Thank you so much for posting! (Many people said the beeswax smelled bad and chemically or smoky. Did you find that to be true? Do the candles themselves smell bad or smell bad while burning? Thanks.)
We didn’t have any trouble with the smell – let me know what you think when you’re done! We’ve enjoyed the smell of ours.
woo, we are doing them right now, but doing them in the microwave, we have a pot that just fits, the candles will only be shorties but it’s all about the experience (we did lotion bars and lip balm as well this morning, having a domestic day. Why aren’t the school holidays longer?
Thanks for the link in your post today. This is one of those projects I keep allowing myself to get intimidated about, which is unusual but after reading this I’m def going to tackle it!
This is so awesome! I have never felt like a crafty type person, but maybe…just maybe…I could do this.
You totally could, Erin, I’m about the most non-crafty person out there!
We tried them out today and it was a success!! Thanks for the inspiration!!
We enjoyed this project today. It felt more like cooking than crafting, if that helps anyone decided whether to attempt it. It was a rewarding project. Thank you for the clear and concise directions!
I know this is an old post, but I finally tried it this week with my 8, 7, 5 and 3 year olds…and cousins ages 12, 10, 8 and 4. I figured it might end up being a disaster and so we had lots of back up plans for the littles…but your instructions were amazing, I love your supply list and how easy it was to order everything from Amazon (my only mistake was only ordering one bag of beeswax because I didn’t realize it comes in two pounds bags…but it worked out) and your details were perfect. Each of the children made a set of candles that turned out beautifully…and the mess was minimal (which says a lot with so many children). The children took turns in sets of two or three, and every single one of them loved the experience (the tiniest ones included, we found with the correct foot stool and a little adult help, they could do it well). I used a wide mouth canning jar. I melted two pounds of wax in a half gallon one, then filled a quart jar with melted wax…and used the leftovers to re-fill as the candles started to deplete our melted supply. I would never have attempted this without your post so thank you so much for sharing!
This makes me absolutely delighted to hear!! As a non-crafty mama myself, I know just how important it is to have every step carefully written out!! So glad it worked for you!
Have you tried adding any tints to the candles? Was thinking it would be fun to incorporate some red for Christmas. Thanks for these great instructions. Can’t wait to try it out.
I haven’t, but that would be beautiful!
Pretty! As a kid I loved making candles but never did hand dipped ones.
We’ve done this each year at our local Waldorf School Holiday Faire. There, we dip the candle wicks into melted wax, then water–back and fire and back and forth for about 30-45 minutes until the candles are “done”. They keep the wax liquid in old coffee cans inside crock pots filled with simmering water. The room smells fabulous. The atmosphere is meditative. Bonus: if you like, you can press berries and leaves into the candles while they are warm. A few more dips into hot was “seals” the decorations in. Wrap in butcher or kraft paper for a wonderful gift!
Back and FORTH. No actual fire is used, lol!
I was so glad to see someone post having done this with success! We did it with POS / Geo matters – and what a mess! They didn’t tell us about the NUTS! Well, nuts. It would have worked. We couldn’t get the bloody wick to sink. What an obvious answer! I vowed never! to do this again, but as we have wicking and paraffin enough for a gazillion candles in the basement now… maybe we will try again. Thanks for the impetus!
Oh no, Samantha, that would be a total disaster! Save it for a day when you’re feeling brave and give it another go!!
Oh wow, I am definitely going to be giving this a go. It looks amazing.
I need your opinion, Jamie. I do a creator club meetup for our homeschool group and we are planning to make candles in January. There will be a maximum of 12 kids. They are either 10+ or they have a parent working with them if they are younger. We meet for 2 hours. If I have 4 crockpots with vases of melted wax in them sitting on the tables where they work, would it be reasonable for all the kids to make a couple pairs of candles in this time? I think so, but since you’ve done this I thought I’d ask you.
I’m planning to have some drying racks made of dowels sitting on the tables between the crockpots so they aren’t walking around with dripping wax.
I would think this would work okay, Sandi, yes!
Wow, this activity looks just perfect for warming up a home during a cold, grey winter. I’m going to put together a kit for my daughter to do this for Christmas! Jamie, I just love the candleholder in your last picture. Any idea where it came from?
I love the photo of the boy holding the finished candles. My kids love doing different kinds of crafts and making candles seems like a fun idea. We will be sure to find a kit candle making kit so that we have all the appropriate supplies.
Hi, thanks for all the tips on how to accomplish this. I am trying to gauge how much wax I need to purchase for 20 candles (two candles each for 10 kids.) How much did you use and how many candles did it yield? I am wondering if I should order 2lbs or 3lbs or even more. Thank you!
Hi Sonja! 3 pounds was enough for us to make 20 6-inch candles, with leftover to start the process again next time, so I would use that estimate to help you figure out how much to order!